
As the sun sets, there’s a magical feeling in the air, perfect for cozying up with yarn and a hook. Today, I’m thrilled to share my newest creation: the adorable Strawberry Penguin Amigurumi! This crochet penguin pattern is a delightful challenge that puts a whimsical spin on traditional amigurumi, inviting both intermediate crafters and adventurous beginners to try their hand at something special. Not only does this project help you enhance your skills, but it’s also quick to make, turning vibrant colors into a plush, huggable treasure. With its soft, comforting texture and captivating design, this little penguin is sure to charm everyone from little ones to adults, making it the perfect gift or nursery décor. Are you ready to dive into a world of creativity and fun? Let’s get stitching!
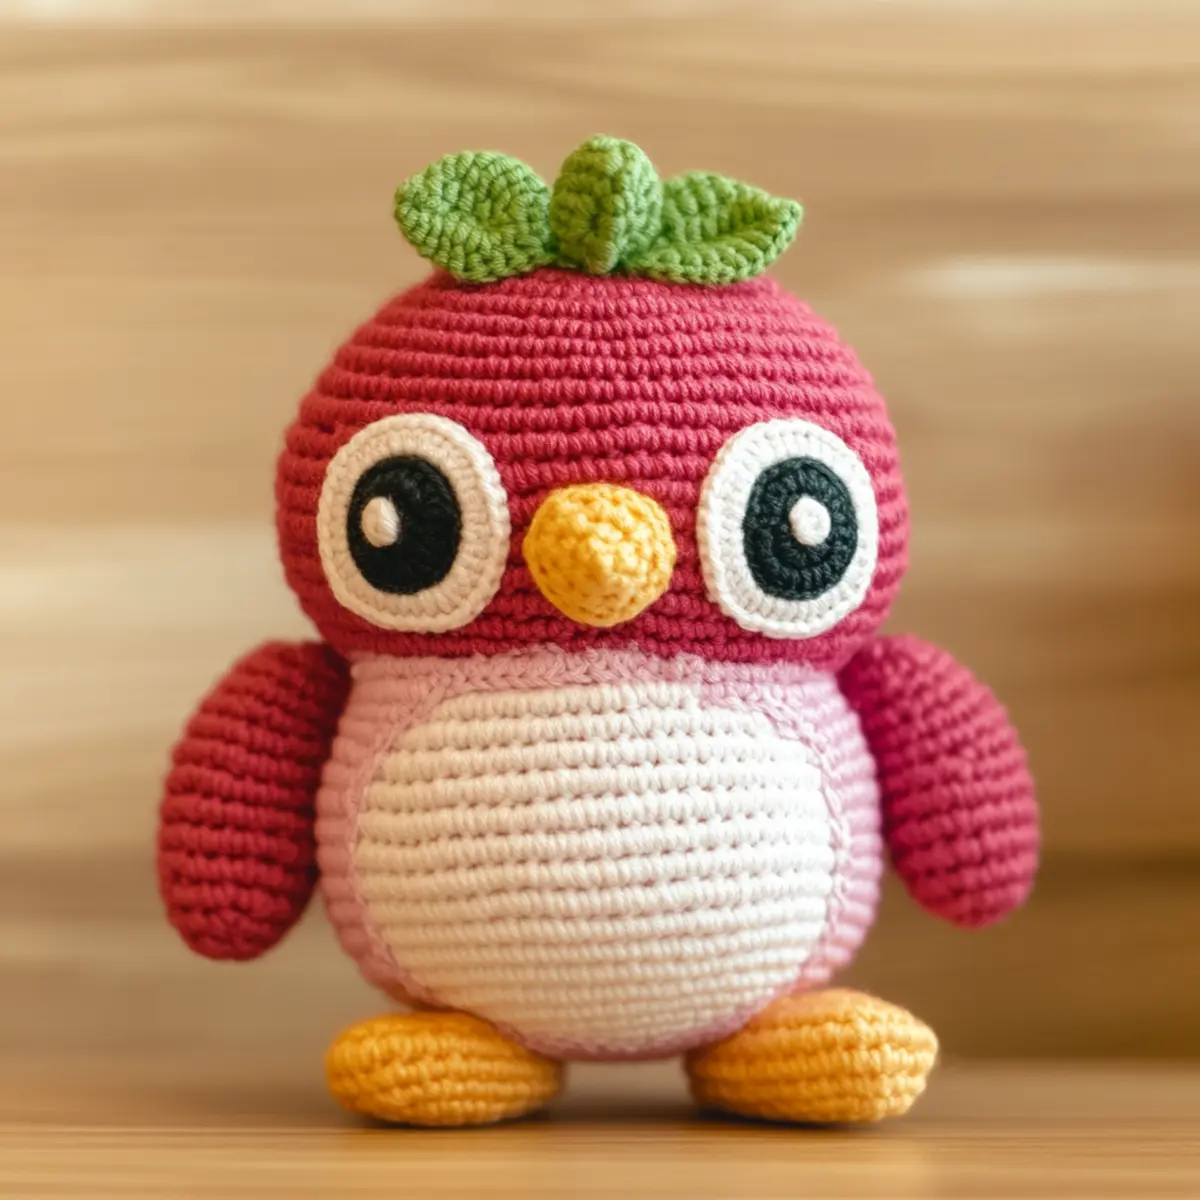
Crochet Penguin Pattern Materials & Tools
Get ready to gather the essentials for your delightful Strawberry Penguin!
Yarn
- Worsted Weight Yarn – You’ll need about 150-200 yards in soft pink for the body, plus lighter shades for the belly and green for the leaves.
Tools & Notions
- 4.0mm (G/6) Hook – This size is perfect for achieving a tight gauge to keep your stitches neat and sturdy.
- Sewing Needles – Use these for assembling parts; a tapestry needle works well for yarn.
- Fiberfill Stuffing – You’ll need this to give your penguin that huggable and plushy feel.
- Safety Eyes (optional) – For an adorable finish, use these instead of embroidering the eyes for a more whimsical look.
Let’s get crocheting and bring this charming penguin to life!
Why is this crochet penguin pattern special?
Whimsical Design: This Strawberry Penguin stands out with its playful theme, combining the adorable shape of a penguin with vibrant strawberry colors, making it a joyous addition to any collection.
Charming Gift Option: Perfect for kids or as nursery decor, this plush friend is sure to bring smiles and warmth to anyone’s heart.
Skill Builder: Intermediate crafters will find this pattern a fun challenge, while those new to amigurumi can dive in with some persistence, enhancing their skills along the way.
Huggable Comfort: The soft yarn used ensures a delightful cuddly texture, ideal for cozy snuggles and playful adventures.
Endless Customization: Experiment with colors and sizes to create variations of this delightful penguin, from winter themes to family sets, pushing your creativity to new heights.
If you’re looking for more fun projects, check out our guide on easy amigurumi patterns to find your next stitching adventure!
Gauge & Sizing Notes
Don’t skip the gauge swatch! Checking your gauge is crucial for the success of your crochet penguin pattern, ensuring your Strawberry Penguin turns out the right size and shape. Aim for a standard gauge of 4×4 inches (10×10 cm), which should equal approximately 14 single crochets by 8 rows. If you find your gauge isn’t matching, possibly due to a tight or loose tension, you can adjust sizing; simply make your starting chain in multiples of 6 + 2 for a wider penguin. If your swatch is smaller than expected, try going up a hook size to achieve that perfect plush look. Happy crocheting!
Step‑by‑Step Pattern for Strawberry Penguin Amigurumi
Row 1: Magic Ring for Body
Begin by creating a magic ring. Inside the ring, work 6 single crochet (sc) stitches to form the base of your crochet penguin pattern. Pull the tail to tighten the ring, and your work should close nicely. This sets the foundation for the body (6 sts).
Row 2: Increase for Body Base
In this row, you will increase your stitches. Work 2 single crochet (sc) in each stitch around for a total of 12 single crochet (sts). This round should start to widen your base, and the shape should begin to flatten as you increase the size (12 sts).
Row 3: Continuing Increases
For this round, perform 1 single crochet (sc) in the next stitch, then increase in the following stitch. Repeat this pattern around the row, resulting in a total of 18 stitches. Your work will continue to form a circular shape, and it should feel more substantial as you progress (18 sts).
Row 4: Straight Body Section
Now, you’ll work even. Create 1 single crochet (sc) in each stitch around for this entire row. This will establish the sides of the body. Keep checking to ensure your stitches are even; your work should feel cylindrical as you complete this row (18 sts).
Row 5: More Body Height
Continue with the even rows by repeating row 4 for the next 4 rows. Each round should have 18 single crochet (sc). Your crochet penguin’s body will start to take shape and gain height, creating the plush appearance of your adorable amigurumi (18 sts for each row).
Row 6: Begin Decreasing
Start to decrease for the top of the body now. Work 1 single crochet (sc) in the next 3 stitches, followed by a decrease. Repeat this around, and you will finish with 14 stitches. The top of your penguin should begin to slightly shape inwards as you decrease (14 sts).
Row 7: Final Body Decrease
For this round, crochet 1 single crochet (sc) in the next 2 stitches, then decrease. Continue this around to finish with a total of 10 single crochet (sts). You’re nearing the end of the body, so make sure it feels snug as it gets smaller (10 sts).
Row 8: Closing the Body
For the last round of the body, crochet 5 single crochet (sc) stitches, followed by 5 decreases. This will bring your work down to 5 stitches. Your body will feel well-formed at this point, and it should resemble a cute little penguin (5 sts).
Step 9: Stuffing the Body
Before closing the body, take your fiberfill stuffing and gently fill your penguin until it feels plush and rounded. Ensure not to overstuff, as it may change the shape. Once you’ve found the right feel, it’s time to finish up (keep the opening accessed).
Step 10: Attaching the Belly
Using a contrasting color, attach yarn at the bottom section of the body for the belly. Work a round of 12 single crochet (sc) in a color of your choice, sewing it into place. This will create a lovely tummy for your strawberry penguin.
Step 11: Making the Head
To create the head, begin with a magic ring again, starting with 6 single crochet (sc). As with the body, pull the ring tightly and establish the base for your penguin’s cute head (6 sts).
Step 12: Building the Head
Work in increases for the next 2 rows, 2 sc in each stitch around (12 sts) and then (18 sts). Your head should start to feel round and plump, getting ready for delightful features!
Step 13: Decreasing for the Head
Just like with the body, decrease the head by working 1 single crochet (sc) in the next 3 stitches, then decrease until you have 10 stitches left. Your work will continue to round out the top of your penguin’s head (10 sts).
Step 14: Finalizing the Head
For the head closure, perform a single crochet (sc) in the next 2 stitches, then decrease. You’ll finish this round with 5 stitches. Add stuffing similar to the body as you start closing (5 sts).
Step 15: Assembly of Penguin
Now it’s time to assemble your strawberry penguin. Sew the head onto the body securely, ensuring it’s centered. Use your sewing needle and yarn to ensure a nice attachment, which will keep everything stable and cute.
Step 16: Adding Arms and Legs
Create the arms and legs with small pieces, following the same magic ring method. Work 4-6 rounds, then attach similar to the head and body. This gives your penguin a playful pose and cozy look!
Step 17: Detailing and Leaf Embellishment
For strawberry leaves, make a small chain and work in clusters of stitches to create the leaf shape. Attach them securely to the head. Use contrasting colors or stitches to add a whimsical style to your adorable penguin.
Step 18: Finishing Touches
Lastly, embroider or add safety eyes for the perfect penguin gaze. Check that all pieces are securely attached and tidy. Your charming Strawberry Penguin is now ready for cuddles and creativity!
Helpful Tricks for Crochet Penguin Pattern
-
Tension Control: Ensure your tension is consistent throughout your work to avoid gaps or lumps; this is crucial for fitting the components perfectly together.
-
Stitch Counting: Keep a close eye on your stitch count; regularly counting as you progress will help you maintain the correct shape, particularly when working on smaller parts.
-
Finishing Touches: After assembly, gently block the pieces with steam to help them hold their shape, but remember to avoid direct heat to preserve your yarn’s texture.
-
Join Method: When stitching pieces together, use a slipped stitch or a whip stitch for a seamless finish that maintains structural integrity while being aesthetically pleasing.
-
Safety Eyes: If using safety eyes, ensure they are securely attached to prevent accidents, especially if this penguin will be a toy for children.
Remember, this crochet penguin pattern offers a delightful experience, so take it one stitch at a time!
Crochet Penguin Pattern Customizations
Feel inspired to make this playful project truly your own by exploring fun variations and substitutions!
- Yarn Weight Swaps: Consider using bulky yarn for a larger, cuddlier penguin that’s even more huggable and soft to the touch.
- Color-blocking Ideas: Play with a blue body and white highlights to create a seasonal winter penguin or a festive red and green for a holiday theme.
- Texture Twists: Add charming details like a fluffy pom-pom on top of its head or delightful fringe along the edges of its belly for extra texture.
- Size Adjustments: Create a family of varying sizes by adjusting the body and head dimensions while keeping the same pattern flow; this adds a wonderful charm to your collection!
- Fiber Alternatives: Try cotton yarns for a crisper finish or a bamboo blend for a smooth, eco-friendly option that adds a unique feel to your plush creation.
- Embroidered vs. Safety Eyes: Opt for embroidered eyes instead of safety eyes for a softer, more whimsical appearance that enhances the charm of your penguin.
- Fun Accessories: Why not add a tiny scarf or little booties to your penguin? These playful accessories allow for personal expression and fun color choices!
- Layering Techniques: Incorporate various color layers in the body to create a fun gradient effect, making your penguin stand out in any room.
As you embrace your creativity on this delightful crochet adventure, check out our guide on easy amigurumi patterns to keep the inspiration flowing!
How to Wash and Care for Your Crochet Penguin
-
Machine Washing: Use a gentle cycle with cold water to keep your crochet penguin pattern intact. Always place it in a laundry bag to prevent tangling or snagging during the wash.
-
Hand Washing: For a more delicate approach, hand wash your plush penguin in cold water with mild detergent. Gently squeeze out the water without wringing to avoid damaging its shape.
-
Drying/Blocking: Lay your strawberry penguin flat on a clean towel to dry. Avoid direct sunlight or heat sources, as they may alter the softness of your yarn and affect its cuddly texture.
-
Storage: Store your finished penguin in a cool, dry place away from direct sunlight. If it will be unused for a while, consider placing it in a breathable bag to protect it from dust while maintaining its plump shape.
Strawberry Penguin Amigurumi FAQs
Can I substitute yarn types for this crochet penguin pattern?
Absolutely! While worsted weight yarn (size 4) is recommended, you can substitute with other yarns like cotton or bamboo. Just make sure to adjust your hook size accordingly and check your gauge to maintain the cute proportions of the Strawberry Penguin.
How can I make the Strawberry Penguin bigger or smaller?
To adjust the size of your penguin, you can either change your yarn to a thicker one, like bulky yarn, or simply use a larger crochet hook. If you want to make it smaller, switching to a lighter weight yarn (like sport or DK) with the appropriate hook will work wonders. Don’t forget to check your gauge to ensure the dimensions are as desired!
Why is my Strawberry Penguin work curling up?
Don’t panic! Curling often indicates that your tension is too tight. If your work is buckling like a bowl, try relaxing your grip on the yarn. Additionally, you could check your stitch count, as an incorrect count can also lead to such issues. Blocking your completed pieces can help smooth things out too!
What hook size should I use for the Strawberry Penguin?
For this crochet penguin pattern, a size G/6 (4.0 mm) crochet hook is ideal. This size helps achieve a tight knit, ensuring that your plush penguin maintains its adorable shape. If you’re experimenting with different yarn types, you might consider adjusting the hook size a bit based on the yarn weight!
How do I fix dropped stitches in my amigurumi?
It’s an easy fix! If you notice a dropped stitch, simply use a tapestry needle to weave the yarn back through the remaining stitches to secure it. You can also crochet a few stitches back to catch the drop, ensuring it won’t unravel further while you work. Just take your time, and remember—this is all part of the creative process!
Leave a Reply