
Every stitch in my journey as a crochet enthusiast reveals new delights, and there’s something uniquely charming about the Ladybug Mini Crossbody Bag. With its vibrant colors and playful design, this project not only brings joy but also serves a practical purpose, making it a delightful addition to your accessory collection. Perfectly blending functionality with whimsy, the ladybug crochet bag is a fantastic project that any beginner can easily tackle. It’s the ultimate stash-buster, allowing you to use up those vibrant yarns that have been sitting patiently in your craft room. Moreover, it embraces a no-sew simplicity, making it an even more appealing project. As you work through this pattern, you’ll find yourself immersed in a cozy crafting experience, perhaps recalling childhood strolls in the sunshine, where ladybugs would dance about. What color will you choose to make your ladybug bag truly your own?
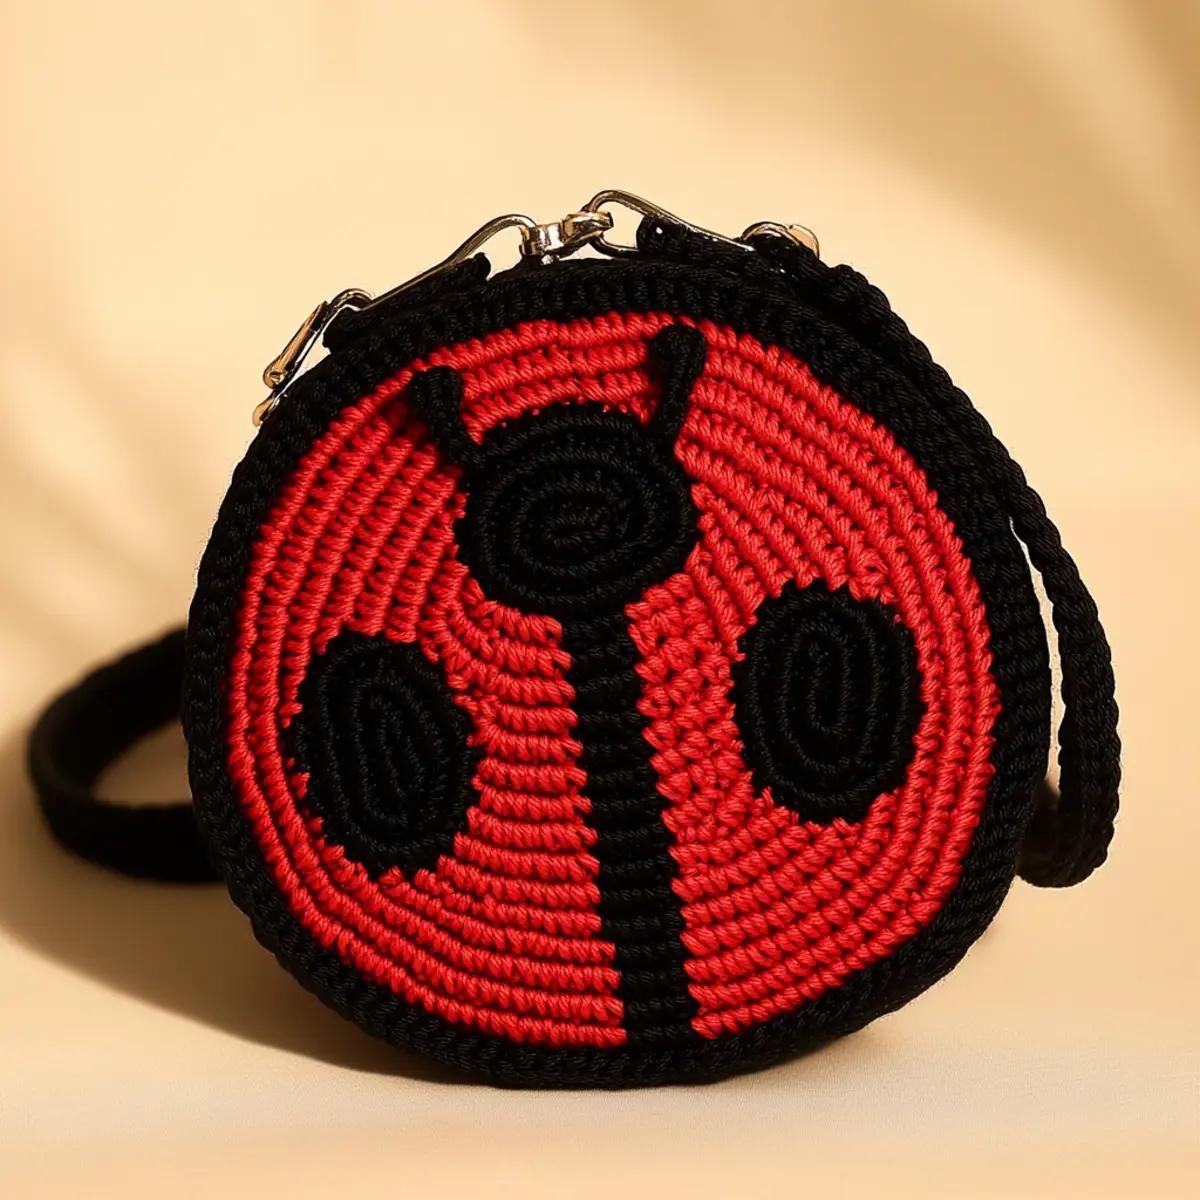
Ladybug Crochet Bag Materials & Tools
Yarn
Cotton or Raffia Yarn – Use approximately 150 yards (140 meters) of red and black combined for a durable and stylish ladybug crochet bag.
Sport or Worsted Weight Yarn – Provides a dense yet lightweight feel, perfect for crafting the bag.
Tools & Notions
2.5 mm to 3.0 mm Crochet Hook – Ideal size for achieving the bag’s needed tension.
D-rings – Essential for attaching the bag strap securely.
Swivel Clasps – Enables a hands-free experience when using the bag.
Stitch Markers – Help keep track of rounds and stitches while crocheting.
Other Suggestions
Feel free to experiment with color combinations to personalize your ladybug crochet bag! Consider using larger yarn and hooks for a bigger size or incorporating different embellishments like pom-poms for added flair.
Why You’ll Love This Pattern
Ideal for beginners, this project is simple yet captivating, letting anyone dive into crochet without feeling overwhelmed. The texture of the bag, shaped with single crochet stitches, gives it a lovely finish that is both sturdy and inviting to touch. Plus, it’s a fantastic stash-buster—an ideal way to use leftover yarn while creating something playful and functional! Customize your ladybug crochet bag by trying different yarn colors or embellishing with felt shapes, which you can learn more about in our yarn guides. With a time-saving design, the pattern’s quick construction will have you styling your cozy new bag in no time. Finally, its aesthetic appeal is undeniable—bright reds and playful spots bring joy to everyday outfits, making it a piece that stands out effortlessly. Discover additional crochet tips by visiting our beginner crochet patterns page!
Gauge & Sizing Notes for Ladybug Crochet Bag
Checking your tension is vital for the ladybug crochet bag to ensure it holds its shape and structure through use. Aim for a standard gauge of 16 single crochet stitches and 18 rows across a 4×4 inch (10×10 cm) swatch. If your swatch does not match this gauge, you may need to adjust your hook size until you achieve the correct tension. Additionally, to resize your bag, you can modify the starting chain or the number of rows worked, making sure to keep the stitch multiple consistent throughout the body. A properly sized ladybug crochet bag will measure approximately 5.5 inches in diameter and 4 inches in height. Don’t be afraid to experiment with larger yarn or hooks for a more sizable bag, or even try creative embellishments to really make your piece pop!
Step-by-Step Pattern for Ladybug Crochet Bag
Row 1: Create the Base
Begin with a magic circle and chain 1. Make 6 single crochet (sc) stitches into the magic circle. Pull the circle tight to close. (6)
Row 2: Increase the Base
Chain 1 and make 2 sc in each stitch around. This will create the foundation for the ladybug bag’s base. Remember to count to ensure uniformity. (12)
Row 3: Expand
Chain 1 again and work (1 sc, inc) around. This step is crucial for widening as it creates the necessary structure for the ladybug bag. (18)
Row 4: Further Expansion
Repeat the last increase pattern, but now work (2 sc, inc) in each round. This gradual increase maintains the bag’s shape while providing a sturdy base. (24)
Row 5: Final Base Increase
Continue with (3 sc, inc) now, ensuring that your stitches stay consistent and tight to give the bag a good structure. (30)
Row 6: Transition to Sides
Without chaining, work a single round of sc in each stitch for this and all subsequent rounds to form the body of the ladybug crochet bag. (30)
Row 7: Begin Side Rounds
Still using sc, keep crocheting evenly and maintain your tension for a smooth look. Count your stitches every few rounds to avoid any discrepancies in size. (30)
Row 8: Color Change for Ladybug Wings
Start adding a new color for the ladybug’s wings. Change to red yarn and begin the next round while keeping the sc pattern. (30)
Row 9: Wing Shaping
Continue working in sc, but introduce slight visual cues or differ heights where the wings rest. This enhances the blocky appearance of the wings on the bag. (30)
Row 10: Add Special Features
Using black yarn, create the spots on the ladybug as you work the next round. Make sure to distribute them evenly to give an authentic look to your ladybug crochet bag. (30)
Row 11: Finishing the Top Section
To finalize the bag, work a few rows of sc in red for the top. Pay attention to your tension, so it shapes nicely for closing. (30)
Row 12: Attach D-Rings and Strap
After weaving in all ends, securely attach D-rings on the sides. Add your strap clasp now, ensuring it rests comfortably for practical use. The ladybug bag is ready to show off! (30)
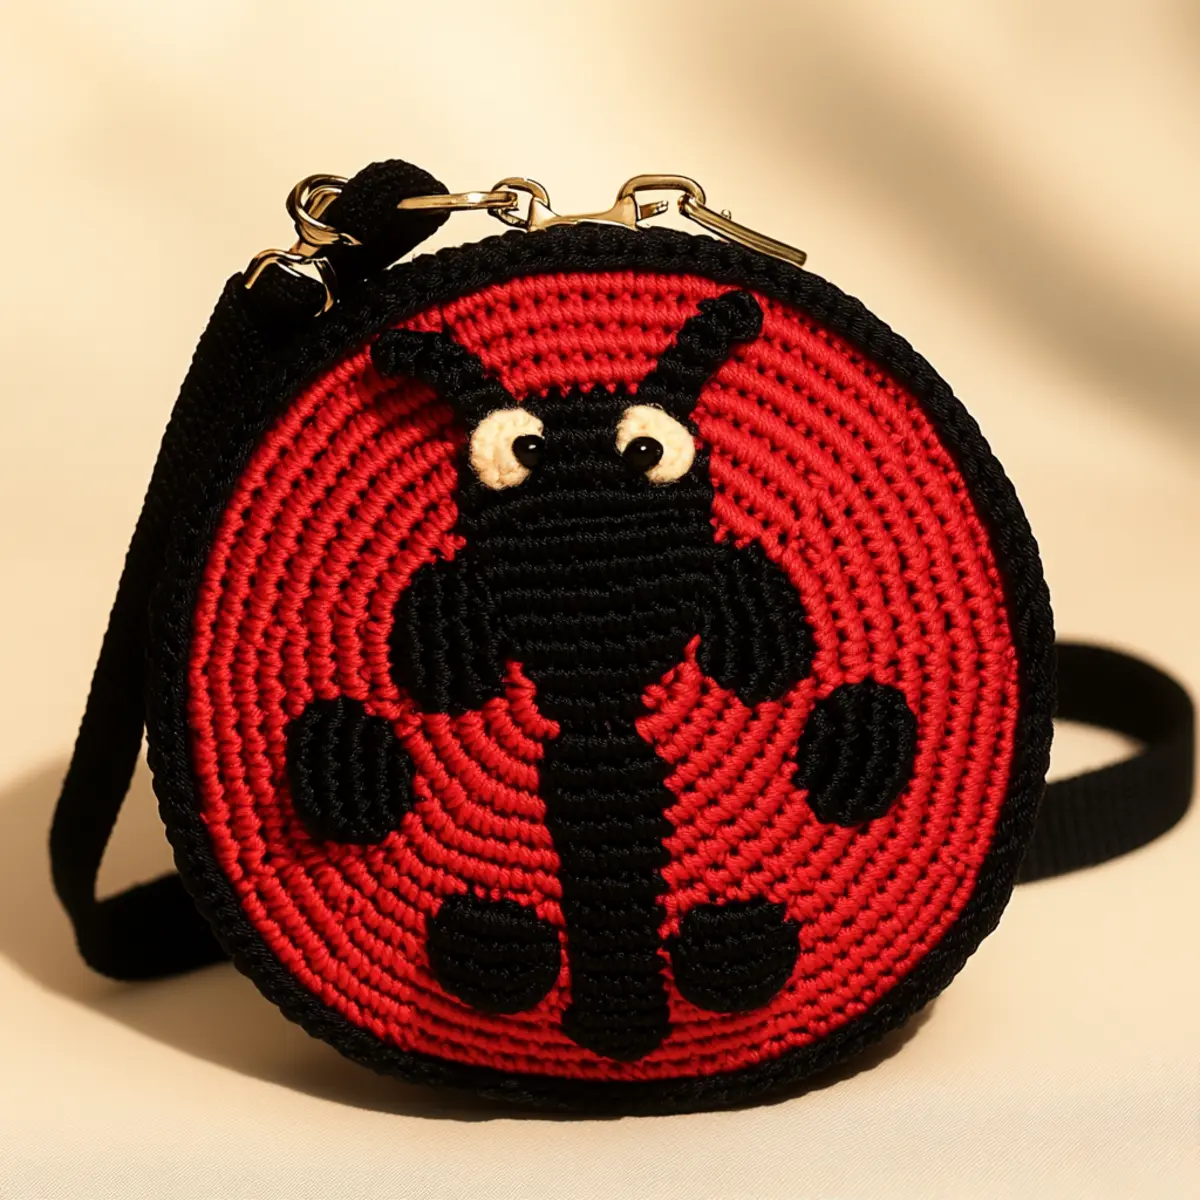
How to Wash and Care for Your Ladybug Crochet Bag
Machine Washing: Use a cold, gentle cycle to machine wash. Avoid agitation to protect the texture of the yarn and keep it looking new.
Hand Washing: If preferred, use lukewarm soapy water and gently swish the ladybug crochet bag without rubbing to maintain its shape.
Drying: Always lay the bag flat to dry after washing to avoid stretching or deforming the shape. Avoid hanging to prevent unwanted stretch marks.
Storage: Store your ladybug crochet bag in a cool, dry place, away from direct sunlight to retain its vibrant colors and integrity.
Expert Tips for the Best Ladybug Crochet Bag
Count Regularly: Regularly count your stitches to ensure the bag’s shape remains consistent, especially when switching colors or working in rounds.
Maintain Tension: Focus on keeping an even tension throughout your work to prevent distortion and achieve a polished look for your ladybug crochet bag.
Avoid Tight Stitches: Be mindful of overly tight stitches; they can cause curling and impact the overall size, leading to frustration while crafting.
Secure Your Ends: Weave in end threads securely to maintain a clean finish. Loose threads could unravel or give an untidy appearance to your bag.
Use Markers: Employ stitch markers to help keep track of rounds, particularly during color changes, which are essential for the ladybug’s distinctive design.
ladybug crochet bag variations
This project offers endless possibilities for personalization and creativity!
- Color Swaps: Experiment with pastel shades like lavender or mint for a soft look that suits a summer vibe.
- Larger Size: Switch to bulky yarn and a bigger hook for a spacious bag, perfect for carrying more items.
- Textured Yarn: Consider boucle or other textured yarns to add dimension and fun to the overall design.
- Embellishments: Add felt shapes or small pom-poms for an extra playful touch. Use a combination of colors and shapes for better visual appeal.
- Strap Adjustments: Lengthen or shorten the strap to transform your bag from a crossbody to an elegant shoulder bag.
- Themed Variations: Make other bug-themed bags by creating beetle or butterfly designs, giving you a whole collection of adorable accessories. A multi-bag approach can delight both kids and adults!
- Strap Options: Play with different strap styles, such as a crochet strap versus a fabric one, for a completely different aesthetic.
- Seasonal Colors: Craft a seasonal version of the bag by using colors that correspond to the season—think earthy tones for fall, or bright colors for summer.
Remember, the ladybug crochet bag can be customized to reflect your personal style and seasonal trends, making it a vibrant addition to any ensemble.
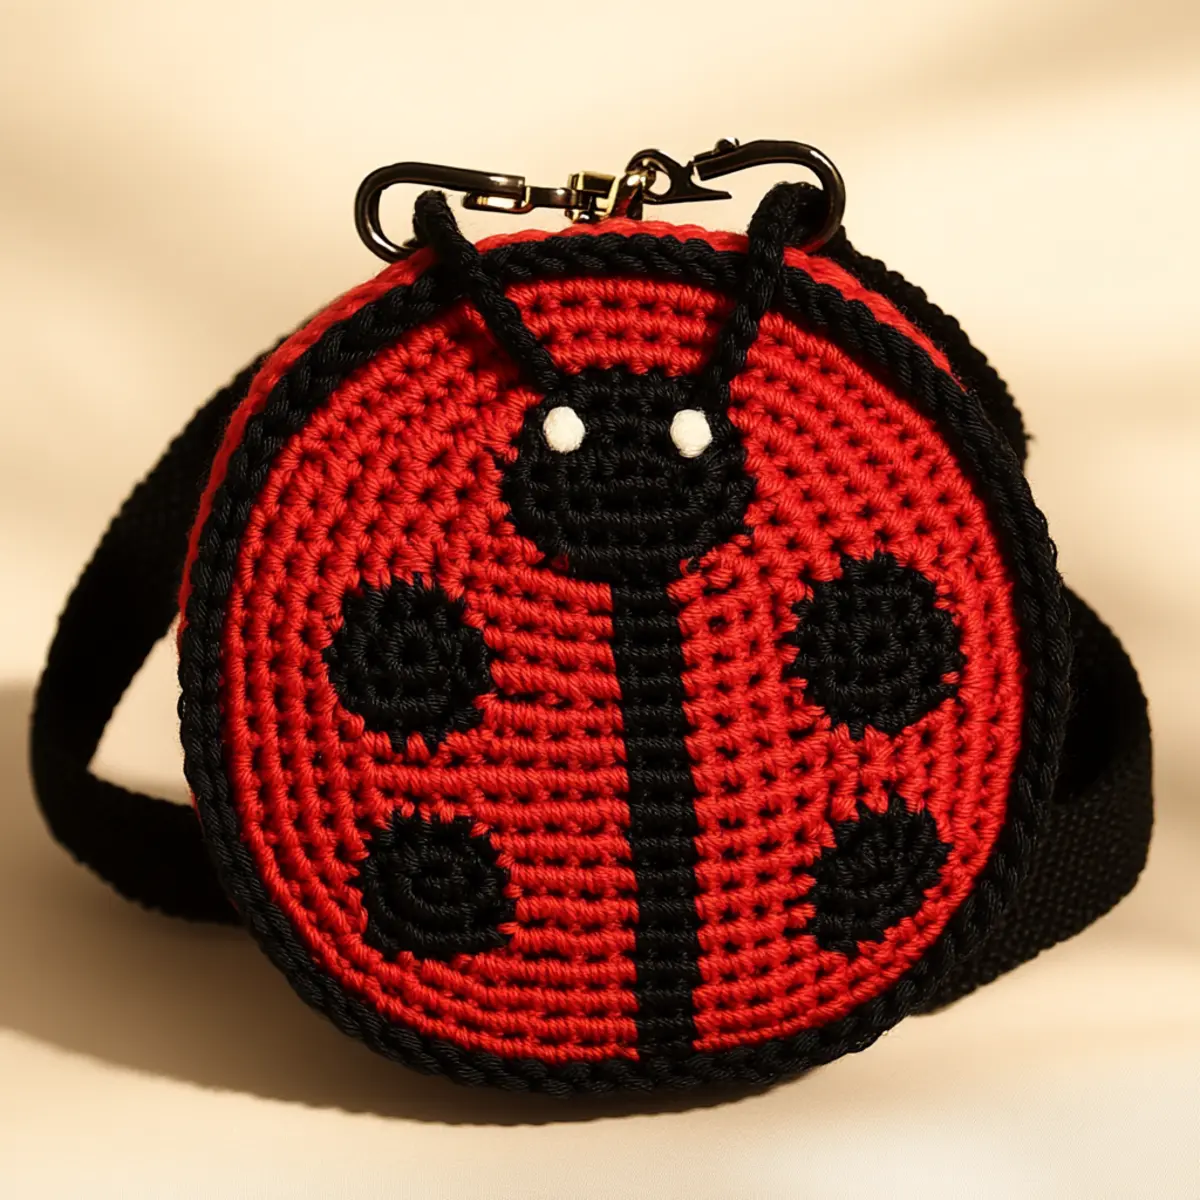
Ladybug Crochet Bag FAQs
Can I substitute yarn for this project?
Absolutely! You can use different yarn types, but ensure they are of a similar weight to maintain the intended structure and aesthetics of the ladybug crochet bag.
What size hook should I use?
For this project, a 2.5 mm to 3.0 mm crochet hook is ideal. However, adjust based on your tension to achieve the best results, keeping the gauge in mind.
How can I adjust the size of the bag?
You can modify the starting chain or increase the number of rows to create a larger ladybug crochet bag. Just keep the stitch multiples consistent while working, and check your gauge.
What should I do if my stitches keep curling?
Don’t panic! Curling can often result from tight stitches. Make sure to maintain a relaxed grip and keep a consistent tension throughout. If it persists, consider blocking your finished piece.
How do I troubleshoot dropped stitches?
If you notice a dropped stitch while working, simply pull back to the last complete round and rework the stitches carefully to avoid any inconsistencies in your ladybug crochet bag.
What embellishments can I add?
Feel free to personalize your ladybug crochet bag with felt shapes, pom-poms, or even beads! These additional features can enhance the whimsical design and make it truly your own.
Leave a Reply