
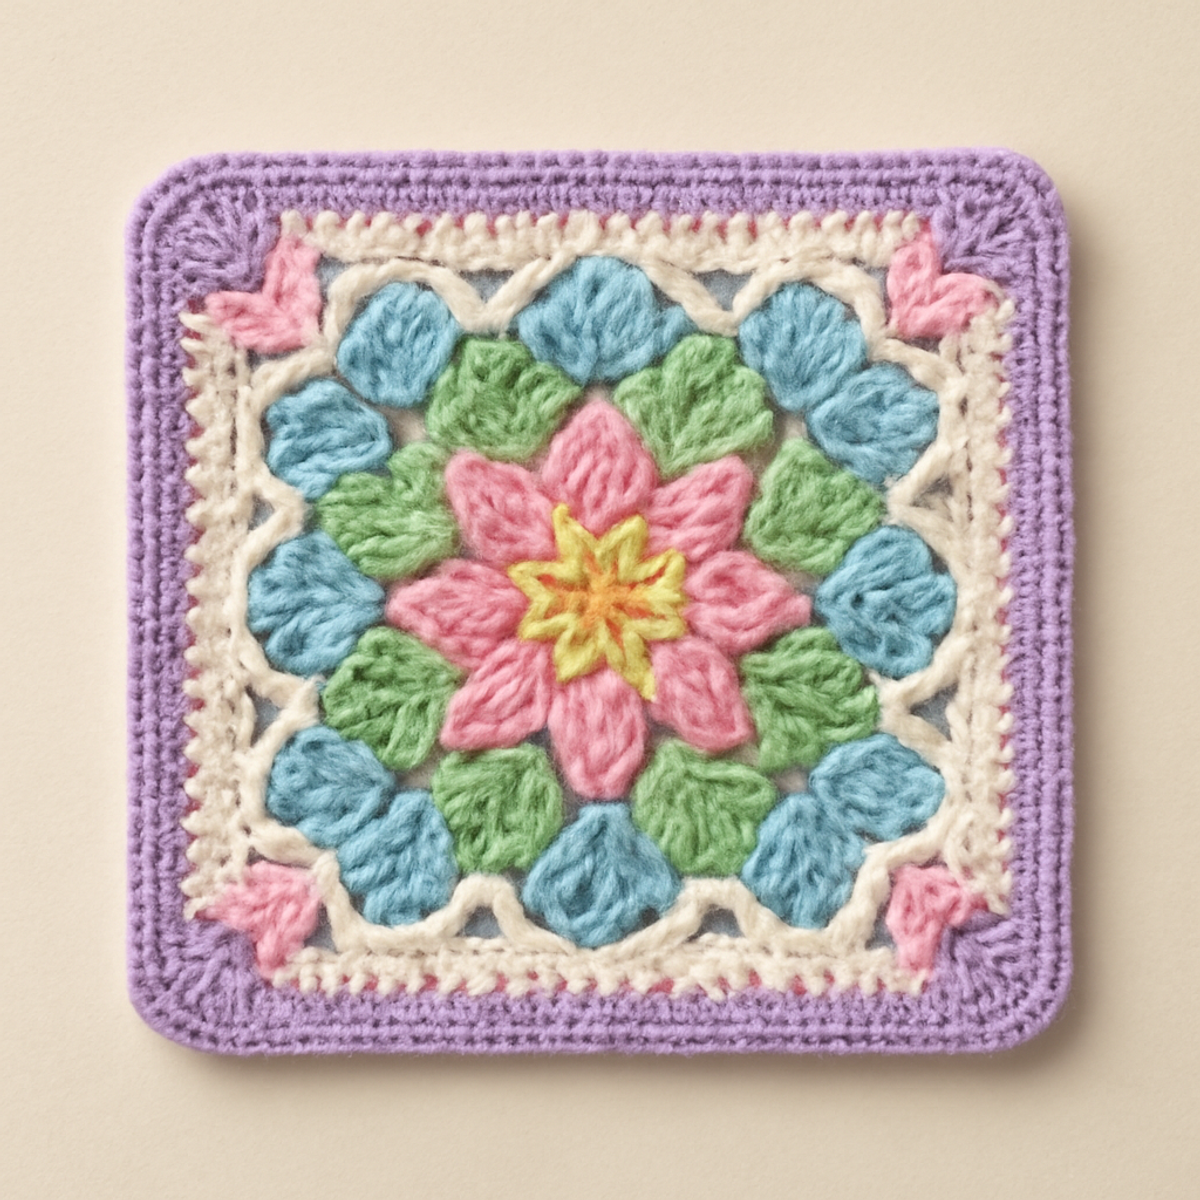
As I drape my yarn across my fingers, the colorful fibers coax my creativity to life, whispering promises of the beautiful projects to come. Today, I'm excited to share a delightful crochet granny square pattern that embodies charm and complexity—introducing the "Blooming Granny Square." This project promises not just a joyful crafting experience but also the chance to flex your skills with floral designs and color blending, making it ideal for crafters looking to elevate their repertoire. With its vibrant palette and versatile nature, this square can shine on its own as a decorative piece or serve as a building block for larger creations like cozy afghans or stylish bags. Ready to immerse yourself in this lively adventure? Let's get started!
Blooming Granny Square Materials & Tools
-
Yarn
- DK or Lightweight Worsted Yarn – A blend of cotton or acrylic fibers is recommended for durability and visual appeal; aim for approximately 50-100 yards per color.
-
Hook
- 4.0mm (G) or 4.5mm (G-7) Hook – Choose a hook size that feels comfortable for your tension while working on your crochet granny square.
-
Notions
- Yarn Needle – Essential for weaving in ends for a polished look on your finished square.
- Stitch Markers – Handy for tracking rounds, especially when changing colors to maintain even tension throughout your project.
Embrace the joy of crafting your crochet granny square with these materials and tools, and let your creativity blossom!
Why is This Granny Square Irresistible?
Versatile Design: The "Blooming Granny Square" serves as a foundation for countless creations, from cozy afghans to trendy bags.
Charming Aesthetic: Its vibrant color palette and intricate floral motif ensure that your projects will be both lively and eye-catching.
Skill Builder: This intermediate-level pattern helps you hone advanced crochet techniques like color blending, enriching your crafting skill set.
Quick Finish: With an estimated size of 6-8 inches per side, you can quickly create these squares, making them perfect for those short on time.
Rich Texture: A delightful drape and stitch definition give your project a professional finish, turning heads and sparking conversation.
Embrace the joy of crafting with this delightful pattern, and watch as your crochet skills flourish!
Gauge & Sizing Notes
Don't skip the gauge swatch! Checking your tension is essential when creating your crochet granny square, as it ensures your final piece will be the intended size and hold its beautiful floral design. A general guideline is to work up a 4×4 inch (10×10 cm) square and aim for about 12 double crochets by 6 rows; however, your results may vary based on your yarn and hook choice. To adjust the size, simply increase your starting chain in multiples of 3 for a larger square or reduce it for a smaller version. If your tension doesn’t match, and your work is too small, try going up a hook size to achieve the perfect fit for your crochet granny square project!
Step-by-Step Pattern for Blooming Granny Square
Row 1: Center Flower
Begin with a magic ring. Chain 3 (counts as first dc), then work 11 dc into the ring, ensuring the ring is tight. Pull the magic ring closed and join with a sl st to the top of the beginning chain. Your flower center should have a ruffled edge and 12 stitches total (12 sts).
Row 2: Forming the Petals
Chain 3 (counts as first dc), then in the same stitch, work 2 dc, ch 2, and 3 dc to form the first petal. Skip 1 stitch and repeat for a total of 6 petals around your flower center. Join with a sl st to the top of the beginning chain. The petals should stand out beautifully, creating a floral effect (6 petals).
Row 3: Adding More Petals
For this round, slip stitch to the next ch-2 space. In that same space, work 3 dc, ch 2, and 3 dc to create the first petal again. Repeat this around each petal, making sure to place the petals in the ch-2 spaces. Ensure the petals remain fluffy, giving your crochet granny square width and depth (12 petals total).
Row 4: Transition to Border
Slip stitch to the next ch-2 space again. Chain 1, and work 1 sc in the same space and in each petal, including the ch-2 spaces, to establish the border. This round will create a lovely frame for your floral design. Count your stitches regularly to ensure evenness all around (24 sts).
Row 5: Continuing the Border
In this round, chain 1, then 1 sc in next sc, ch 2, sk 1 and repeat from *. This round will create open spaces for a delicate border. Your work should look airy as the open stitches frame the colorful petals beautifully. Continue around and join with a sl st (12 ch-2 spaces).
Row 6: Finalizing the Border
For a crisp finish, slip stitch to the first ch-2 space. Work 1 sc in the same ch-2 space, then 1 sl st in each sc around for a clean edge. This finishing touch enhances the contrast around your granny square. Your square should now lie flatter and more refined (24 sts).
Step 7: Weaving in Ends
After completing the granny square, carefully weave in all yarn ends using a yarn needle. Ensure the edges are neat and secure to prevent any unraveling. The finished square should display a vibrant floral motif while maintaining a professional look, ready for your next creative project!
Expert Tips for Beautiful Granny Squares
-
Maintain Tension: Consistent tension is crucial when creating a crochet granny square. Try to keep your stitches uniform to ensure a polished finish.
-
Use Stitch Markers: Place stitch markers while changing colors to avoid losing count. This prevents confusion and keeps your rows organized and neat.
-
Count Stitches Regularly: Frequently count your stitches across each round. This simple practice helps catch potential mistakes early, ensuring you maintain the desired stitch count throughout.
-
Block for Flatness: After completing your granny square, block it to enhance its shape and appearance. This step will help it lay flat and display the intricate floral design beautifully.
-
Weave in Ends Securely: Don’t skip the weaving process; ensure all yarn ends are tucked away neatly. A tidy finish elevates your crochet granny square, showcasing your hard work.
How to Wash and Care for Your Blooming Granny Square
-
Machine Washing: Use a gentle cycle with cold water to avoid agitation, which can lead to felting or pilling. Place your crochet granny square inside a mesh laundry bag for extra protection.
-
Hand Washing: For delicate care, soak your yarn piece in cold, soapy water for about 10-15 minutes. Gently agitate with your hands and rinse thoroughly without twisting or wringing the fibers.
-
Drying/Blocking: Lay your crochet granny square flat on a clean, dry towel to absorb excess water. To maintain its lovely shape and ease any wrinkles, gently reshape to the desired dimensions before allowing it to air dry completely.
-
Storage: When not in use, store your finished granny square in a cool, dry place, away from direct sunlight. Use a breathable cotton bag or a container that allows air circulation to prevent mold and mildew.
Crochet Granny Square: Variations & Substitutions
Invite your creative spirit to soar as you personalize this enchanting pattern with delightful twists!
-
Yarn Substitutions: Experiment with luxurious wool for added warmth or soft acrylic for easy care without compromising the vibrant look.
-
Larger Version: Use a larger hook or add extra rounds to create an oversized granny square perfect for cozy blankets or bigger projects like throws.
-
Fringe Finish: Add a playful fringe around the border for a boho-chic aesthetic that brings a playful touch to your finished granny square.
-
Color Blocking: Use a solid color for every alternate round to create a stunning color-block effect that can match any decor.
-
Textured Border: Incorporate puff stitches or crab stitches in the border for a unique texture that'll elevate your square's charm.
-
Seasonal Themes: Customize your palette with specific color schemes for holidays—in warm red and green for Christmas or soft pastels for Easter.
-
Cotton Alternative: Swap in a cotton yarn for a breathable, lightweight square ideal for warmer weather projects like picnic blankets.
-
Adjustable Sizing: Alter the number of rounds based on your intended use, making a smaller square for coasters or an expansive one for table centerpieces.
What to Pair with Blooming Granny Square?
Imagine transforming your vibrant granny squares into a matching collection that brightens up your home and showcases your crafting skills.
- Charming Pillow Covers: Create pillow covers that echo the floral designs of your squares, adding a cozy touch to your living space.
- Colorful Coasters: These quick projects can use your leftover yarn, bringing bright splashes of color to any table décor.
- Stylish Tote Bag: Incorporate your granny squares into a tote bag; it’s both functional and a fashionable showcase of your crafting talent.
- Cheerful Table Runner: Link multiple squares together to make a delightful table runner that radiates warmth and joy for gatherings with loved ones.
- Matching Blanket: Assemble your completed squares into a cozy blanket, wrapping your surroundings in comfort and your unique artistry.
- Funky Headband: Use a single square to design a trendy headband, blending style with the spirit of your crochet granny square.
Blooming Granny Square FAQs
Can I substitute the yarn for this project?
Absolutely! While the recommended yarn is DK or lightweight worsted, you can experiment with other yarn types. Just be aware that yarn weight affects the overall size and texture of your crochet granny square. If you choose a thicker yarn, consider using a larger hook to maintain your desired dimensions.
How can I adjust the size of my granny square?
Don't panic! To make your granny square larger or smaller, simply use a different hook size or adjust the number of rounds you work. For instance, if you want a smaller square, use a smaller hook and reduce the rounds you complete. Keep in mind that every stitch adjustment may change the overall look and drape of your finished piece.
Why is my work curling and how do I fix it?
Curling is a common issue, but it's easy to fix! Make sure you're maintaining consistent tension throughout your stitches. If your work still curls, try blocking the square after completing it. This involves wetting the piece, gently reshaping it, and allowing it to dry flat, which can help smooth out the shape beautifully.
What size hook should I use for the Blooming Granny Square?
For this project, a 4.0 mm (G hook) or 4.5 mm (G-7 hook) is recommended. However, if you tend to crochet tightly or loosely, you may want to adjust your hook size to maintain the desired gauge. I recommend checking your gauge first to ensure your stitches are even throughout the square.
How do I fix dropped stitches in my granny square?
Oh no, dropped stitches can be frustrating, but don’t lose hope! Use a yarn needle to carefully reinsert the dropped stitch back into place, pulling it through the surrounding stitches to secure it. If the stitch is too far down, you may need to frog (rip out) back to the error and rework those stitches. Remember, it's part of the learning process!
Can I change colors multiple times in my granny square?
Of course! Color changes are one of the enchanting aspects of creating this crochet granny square. Just be sure to catch the new color at the right stitch or space, and consider using a stitch marker to keep track of where you’ll change colors. This way, your floral design will come alive with all your varied color choices!
Leave a Reply