
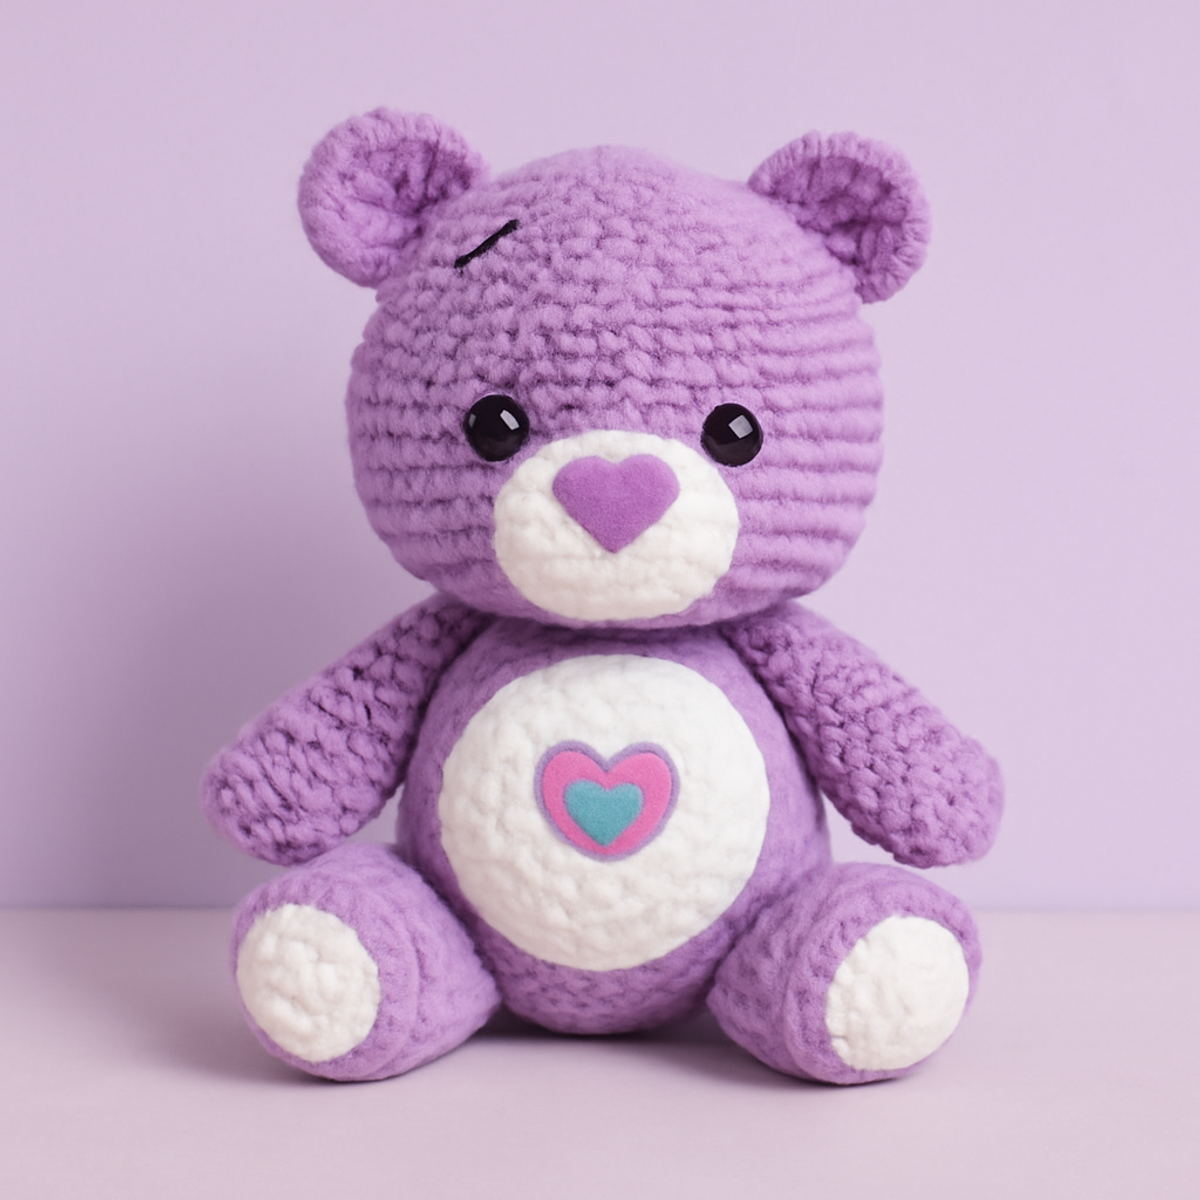
There’s something undeniably heartwarming about a handmade teddy bear that brings a smile to everyone, from little ones to adults. With my Sweet Purple Teddy Bear Amigurumi Pattern, you can create your own vibrant crochet teddy bear that's not only adorable but also the perfect gift for any occasion. This project is a delightful blend of creativity and craftsmanship, allowing you to explore enchanting color choices while honing your crochet skills. Not only does it offer the joy of making a cherished toy, but it’s also an intermediate-level pattern that challenges your skills just the right amount. The result is a cuddly companion, beautifully textured and ready to brighten up any nook in your home. Are you ready to embark on this joyful stitching adventure? Let’s dive into the fun of crocheting your very own teddy bear!
Sweet Purple Teddy Bear Materials & Tools
-
Yarn
- Medium Weight Yarn – Approximately 150-200 yards of purple yarn for the body, with smaller amounts of white, light blue, and light pink for accents.
-
Tools & Notions
- 4.0-5.0mm (G-H) Hook – Ideal size for creating the crochet teddy bear with a cozy texture.
- Yarn Needle – Essential for sewing the pieces of your crochet teddy bear together securely.
- Safety Eyes – A lovely addition for your bear's adorable expression, enhancing its charm.
- Stitch Marker – Helpful for keeping track of rounds, especially when working in the round.
Why Choose This Crochet Teddy Bear?
Charming Design: This crochet teddy bear boasts a cute and modern aesthetic, perfect for both children and adults who adore handmade toys.
Soft Plush Feel: Using medium weight yarn ensures a cuddly texture that’s ideal for snuggling up to or displaying as decoration.
Skill Development: This pattern offers a great opportunity to enhance your crochet skills as you work with various stitches and construction techniques.
Creative Freedom: The whimsical color choices allow you to explore your creativity, whether you stick with the original palette or customize with pastel shades.
Quick Project: Easily completed in just a few cozy crafting sessions, making it a fantastic gift option or a delightful addition to your own collection.
Personal Touch: Add unique facial expressions or color variations to truly make this teddy bear your own and give it that special charm!
Gauge & Sizing Notes
Don't skip the gauge swatch! Ensuring the correct tension is vital for your crochet teddy bear's success, as it affects both the size and appearance of the final product. While a specific gauge measurement isn't provided, it's generally advisable to work a tension swatch that measures 4×4 inches (10×10 cm) with a medium weight yarn for a more accurate fit. To adjust the size of your crochet teddy bear, simply increase your starting chain in multiples of 6 or modify your rounds during construction. If your tension doesn't match the pattern, don’t worry! If your swatch is too small, try going up a hook size to achieve the soft, cuddly proportions that make this amigurumi truly delightful.
Step-by-Step Pattern for Sweet Purple Teddy Bear
Row 1: Head Construction
Start by making a magic ring, then ch 1. Sc 6 into the ring (6 sts). Pull the magic ring tight to close. Your work should form a small circle, ready for the teddy bear's head.
Row 2: Increase for Roundness
Ch 1, then inc in each st around (12 sts). This row helps shape the head into a soft, round form. Your work should feel slightly more bulbous now.
Row 3: Create More Volume
Ch 1, sc in next st, inc in next st repeat around (18 sts). You’re building the teddy bear’s volume; continue to keep the tension even and watch for your shape taking form.
Row 4: Further Increase
Ch 1, sc in next 2 sts, inc in next st repeat around (24 sts). As you expand your stitches, the teddy bear's head should start feeling more defined and fuller.
Row 5: Straight Rounds
Ch 1, sc in each st around (24 sts). Continue with a straight round to maintain the bear's form. Your work should feel stable and nicely structured at this point.
Step 6: Begin the Snout
Ch 1, sc in next 8 sts, change color for the snout, sc in next 8 sts (24 sts). This step introduces the cute face details of your crochet teddy bear, enhancing its character.
Step 7: Forming the Eyes
Ch 1, sc in next 8 sts, attach safety eyes into the first 8 sts. Complete with sc across (24 sts). Position your safety eyes securely to showcase the adorable expression of your teddy bear.
Step 8: Complete the Head Shaping
Ch 1, sc in next 2 sts, dec over next 2 sts repeat around (18 sts). Begin closing up the head by decreasing stitches; it should start to look more three-dimensional now.
Step 9: Finalize Head Closure
Ch 1, sc in next st, dec over next 2 sts repeat around (12 sts). With each decrease, you’re shaping the top of the teddy bear’s head to finish its form neatly.
Step 10: Stuff the Head
Sc the remaining sts closed after adding stuffing to shape the head well (12 sts). Make sure to pack lightly as you secure the head’s shape — it should feel cuddly!
Step 11: Body Start
For the body, make a new magic ring, ch 1 and sc 6 into the ring (6 sts). Just like the head, this will start the foundational shaping for your crochet teddy bear.
Step 12: Body Increase Rounds
Ch 1, inc in each st around (12 sts). Ensure a good fit as you grow the body; it should start taking on the teddy bear's characteristic rounded shape.
Step 13: Building the Body
Ch 1, sc in next st, inc in next st repeat around (18 sts), continuing to work round by round gives the body proper dimensions, keeping your yarn tension consistent.
Step 14: Shape the Body Further
Ch 1, sc in next 2 sts, inc in next st repeat around (24 sts). Now you will have a nice bulky base as you proceed with the crochet teddy bear construction.
Step 15: Straight Rounds for the Body
Ch 1, sc in each st around (24 sts). This establishes the body’s main shape — it should feel cozy and firm, perfect for a huggable teddy bear.
Step 16: Decrease for the Base
Ch 1, sc in next 2 sts, dec over next 2 sts repeat around (18 sts). Watch as your teddy bear's body starts to narrow and take form to support those adorably tiny legs.
Step 17: Closing the Body
Ch 1, dec over next 2 sts around (12 sts). Complete your body and prepare for the gentle transition into the legs; position should be easy to stitch after this step.
Step 18: Crafting the Legs
For the legs, create a magic ring, ch 1 and sc 6 into the ring (6 sts). Work this separately, mirroring the shaping process from the body's structure.
Step 19: Leg Growth
Ch 1, inc in each st around (12 sts). Note the connection; this leg piece will later attach to your crochet teddy bear’s body, lending a playful look.
Step 20: Straighten the Legs
Ch 1, sc in each st around (12 sts). As you work, ensure your leg consistency matches both shape and size — both legs should feel snug and even.
Step 21: Finalize Leg Shape
Ch 1, dec around, filling lightly (6 sts). Once completed, stuff gently to allow a flexible shape. Keep the legs even and ready for your teddy bear assembly.
Step 22: Creating the Arms
Repeat the leg process for arms, starting with a magic ring, sc 6 into the ring (6 sts). Prepare for those adorable little limbs that will complete your teddy bear's aesthetic.
Step 23: Body Assembly
Align and sew the head and limbs onto the body securely to ensure they have proper placement. Your crochet teddy bear should have the specific proportions of head-to-body and limbs nicely attached.
Step 24: Final Touch and Edging
Ch 1, sc around the edges to create a finished border for the teddy bear where necessary. You’re nearing completion; take a step back and admire your work as you finalize those snug edges.
Crochet Teddy Bear Variations
There's endless joy in customizing your crochet teddy bear to make it truly yours, inviting you to explore delightful options!
-
Color Swaps: Change the primary color to mint green or soft yellow for a fresh and playful vibe. Each color brings a unique personality to your teddy bear.
-
Fuzzy Yarn: Opt for a fuzzy yarn blend to add texture, transforming your bear into an irresistibly huggable friend. The whimsical feel adds charm and a cozy touch.
-
Sizing Options: Experiment with different yarn weights to create a larger or smaller version of your teddy bear. Adjusting the size can make a big impact on its overall look.
-
Facial Expressions: Use varied safety eyes and stitch details to personalize your bear's expression. A different face can tell a whole new story!
-
Texture Enhancements: Incorporate fringe or a pom-pom on the teddy bear’s ears or tail for extra cuteness. These little details elevate your project into a whimsical treasure.
-
Patchwork Style: Create a color-blocked look by mixing different pastels for arms, legs, and the body. This playful design approach can add a fun, contemporary twist.
-
Embellished Borders: Add a decorative border to the teddy bear's edges, using contrasting yarn for a refined finish. This simple detail rounds out your bear’s charm beautifully.
-
Miniature Version: Make a smaller mini teddy bear alongside the larger version for an adorable pairing. They can be perfect companions, bringing even more joy to your crafting journey.
Expert Tips for Your Crochet Teddy Bear
-
Maintain Even Tension: Consistent tension is key to a well-formed crochet teddy bear. Uneven tension can lead to lopsided features, so keep your grip relaxed.
-
Use Stitch Markers: When working in rounds, always use stitch markers to track your progress. This helps avoid losing count and ensures your bear stays symmetrical.
-
Avoid Last-Stitch Mistakes: Pay attention to the first and last stitches in your rounds. Dropping or not completing these can distort your bear's shape.
-
Properly Stuff Your Bear: Lightly pack stuffing as you go to maintain shape without making the bear too stiff. This allows for a cuddly finish while ensuring it keeps form.
-
Block for a Polished Look: Once finished, take the time to block the pieces if necessary. This will help shape the teddy bear and offer a more finished, professional look.
-
Customize with Care: If you’re swapping yarn colors or adding expressions, do so thoughtfully. Preserve the overall balance and charm of your crochet teddy bear for the best results!
How to Wash and Care for Your Crochet Teddy Bear
Machine Washing: Use a gentle cycle with cold water to keep your crochet teddy bear in great shape. Avoid agitation, as it can lead to felting or pilling.
Hand Washing: If your teddy bear needs a little extra care, hand wash it in cold water with mild soap. Gently press to remove dirt without wringing the fabric.
Drying/Blocking: Lay your crochet teddy bear flat to dry on a clean towel. This helps maintain its shape and prevents any stretching that can occur in the dryer.
Storage: Store your teddy bear in a cool, dry place, away from direct sunlight. Keeping it in a breathable bag can protect it from dust and damage while retaining its charm.
What to Make after Sweet Purple Teddy Bear
Creating a cozy collection of toys not only enhances the charm of your handmade teddy bear but also invites further creativity into your crafting journey.
-
Charming Bunny: This playful companion pairs wonderfully with your crochet teddy bear, making for a delightful duo that children will adore.
-
Snuggly Blanket: Wrap your teddy bear in a matching blanket using similar shades, providing warmth and comfort that complements the love behind your creation.
-
Cute Pillows: Craft whimsical pillows featuring the same pastel palette, perfect for decorating a child's room and enhancing the overall aesthetic.
-
Colorful Play Mat: A soft play mat in coordinating colors creates a cozy space for playtime adventures, making your teddy bear an integral part of the fun.
-
Miniature Accessories: Knit tiny scarves or hats to give your crochet teddy bear a custom flair, showcasing your creativity in every little detail!
Sweet Purple Teddy Bear FAQs
Can I substitute the yarn for a different type?
Absolutely! While a medium weight (worsted) yarn in a cotton or acrylic blend is recommended for the Sweet Purple Teddy Bear, you can certainly experiment with other fibers. If you're looking for more drape, swap acrylic for a soft bamboo yarn. Just make sure to check your gauge to ensure the final size remains consistent!
How can I make the teddy bear bigger or smaller?
Don't panic! To adjust the size of your crochet teddy bear, simply use a different yarn weight. If you want a larger bear, try using bulky yarn and a larger hook. Conversely, you can opt for a finer weight yarn for a petite version. Keep in mind that you'll need to adjust your stitch count based on the new yarn’s gauge, so checking your tension is key.
Why is my work curling at the edges?
Curling can often happen when working in the round, especially with single crochet. Don’t worry—this is quite common! Make sure you’re keeping an even tension. Additionally, consider adding a few rows of slip stitches or double crochets at the beginning to create a firmer edge, which can help counteract the curling.
What hook size should I use for the best results?
For the Sweet Purple Teddy Bear, a 4.0-5.0mm (G-H) hook is recommended. However, it's always wise to crochet a small swatch first to check your gauge, especially if you're using a different type of yarn. If your stitches seem too loose or tight, simply adjust your hook size accordingly!
How do I fix dropped stitches?
It's an easy fix! If you've dropped a stitch, use your yarn needle to pick it back up carefully. Gently tug on the working yarn to tighten up your stitches. If you're in the middle of a round, make sure the surrounding stitches align properly as you work the dropped stitch back into place.
Can I customize the facial features of the teddy bear?
Absolutely! Personalizing your crochet teddy bear is a wonderful way to make it special. You can experiment with different safety eye colors or even vary the shape of the snout and mouth with embroidery. Just be careful to maintain balance in the features so your teddy bear retains its charming appearance!
Leave a Reply