
As I browse through my collection of yarns, the vibrant hues of cotton beckon, whispering promises of chic creations. This is the perfect moment to dive into my next project: a Granny Bandana. Adorned with a charming granny square stitch, this playful accessory is not only a delight to crochet, but it also proves versatile for any wardrobe. It effortlessly combines style and function, keeping hair in place and providing sun protection during those sunny outings. Suitable for all skill levels, this pattern is welcoming to beginners and still rewarding for seasoned crafters. Prepare to fall in love with the quick construction and engaging texture—it’s a project that works up beautifully while you enjoy the rhythm of your hook. Ready to embrace this crafty adventure and stitch your own unique style? Let’s get started!
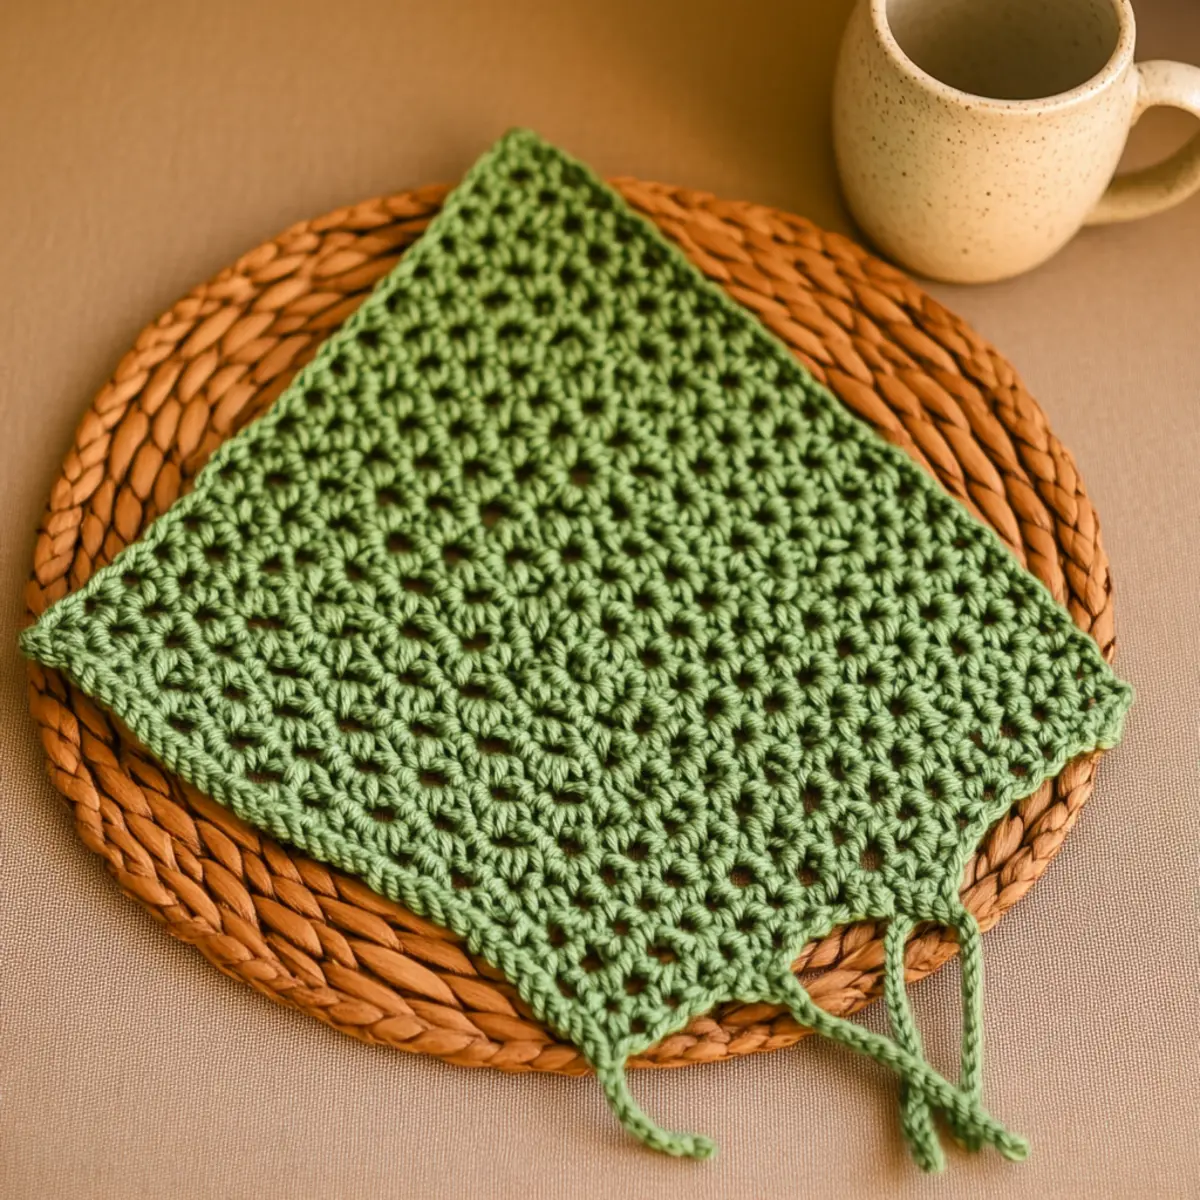
Granny Bandana Materials & Tools
Note: Get ready to gather your supplies for crafting a delightful granny bandana that’s both stylish and functional!
Yarn
• Lightweight Cotton Yarn – Choose a medium-weight cotton or cotton blend, approximately 200-250 yards for a gorgeous drape.
• Gradient Yarn (optional) – This can add a stunning, dynamic effect to your bandana!
Tools & Notions
• 4.0mm (G/6) Crochet Hook – Ideal for achieving the right tension and clear stitch definition.
• Scissors – Perfect for trimming yarn tails with precision.
• Yarn Needle – Essential for weaving in ends neatly for a polished finish.
• Stitch Markers (optional) – Helpful for keeping track of your rows and stitch counts during construction.
Happy crocheting your beautiful granny bandana!
Why Choose the Granny Bandana?
Versatile & Functional: This Granny Bandana is perfect for casual outings! Its unique triangular shape not only adds flair but also keeps hair stylishly in place and offers sun protection, making it a staple during warmer seasons.
Beginner-Friendly: With its straightforward granny square stitch construction, both novice and seasoned crocheters will find joy in creating this accessory.
Aesthetic Appeal: The lovely texture and colorful options allow for endless creativity! Experiment with shades or even a gradient yarn for a captivating effect.
Quick Project: Enjoy instant gratification as this crochet pattern works up quickly, allowing you to wear your creation in no time!
Easily Customizable: Adjust the size with simple modifications for a perfect fit, catering to everyone from kids to adults. Explore more like this colorful granny square to expand your crochet repertoire!
How to Check Your Gauge for Granny Bandana
Don’t skip the gauge swatch! Checking your tension is essential for ensuring your Granny Bandana turns out just the way you envision. Aim for a standard gauge of 4×4 inches (10×10 cm), which should equal 14 double crochets by 8 rows. If you find your tension is looser or tighter, you can adjust the size of your bandana easily: to make it larger, increase your starting chain in multiples of 6 + 2, while for a smaller fit, decrease it. If your gauge swatch doesn’t match, consider changing your hook size—if you crochet tightly, simply try a larger hook to achieve the desired drape and size for your stylish Granny Bandana.
Step‑by‑Step Pattern for granny bandana
Row 1: Foundation Chain
Start by making a foundation chain of 35 chains (ch). This will serve as the top edge of your granny bandana. Ensure your foundation chain is not too tight; it should have a nice drape for future rows.
Row 2: First Granny Cluster
In the 4th chain from your hook, work a double crochet (dc) to create the first granny cluster. Continue by making a dc in the same stitch, followed by chaining 2 (ch 2). Repeat this cluster in every subsequent chain until you reach the end of the row, ending with a total of 6 clusters (6 clusters).
Row 3: Expanding the Triangle
Start the next row by chaining 3 (ch 3) for height. Turn your work and begin your first cluster into the ch-2 space of the first cluster from Row 2. Continue adding clusters into each ch-2 space along the row, placing an additional cluster at the end to maintain the triangular shape (7 clusters).
Row 4: Adding Depth
Repeat Row 3, chaining 3 to start and adding clusters into each ch-2 space, now placing an extra cluster at the end of the row for increased width. This will create an even flow, resulting in 8 clusters by the end of this row (8 clusters). Your triangle should begin to form nicely.
Row 5: Continuing the Pattern
For this row, chain 3 to start, then place a cluster in the ch-2 spaces as before. This time, you’ll place two additional clusters in the last space to widen the bandana. You’ll complete this round with 10 clusters (10 clusters) that further enhance the triangular shape.
Row 6: Increasing Width
Chain 3 at the start to elevate your clusters. Turn and start placing your granny clusters in each ch-2 space, while adding two clusters at the end of the row, further expanding the piece. You should now have 12 clusters (12 clusters) and a noticeable triangle.
Row 7: Textured Finish
Now, continue on with the same method, chaining 3 and placing clusters in each ch-2 space and at the end to maintain shape. With this row, you will have 14 clusters (14 clusters). The texture should feel soft yet sturdy as the bandana develops.
Row 8: Finalizing the Body
For this row, chain 3 again to begin and fill in each ch-2 space with your granny clusters, continuing to add two at the row’s end. Complete the row with 16 clusters (16 clusters). Your granny bandana is nearly complete, showing a beautiful triangular shape.
Step 1: Adding Ties
To create ties for your granny bandana, chain 50 (ch 50) for the first tie. Now, dc in the second chain from the hook and continue along the chain until you reach the end, working 48 dc total. Tie off and repeat for the second tie.
Step 2: Finishing Edges
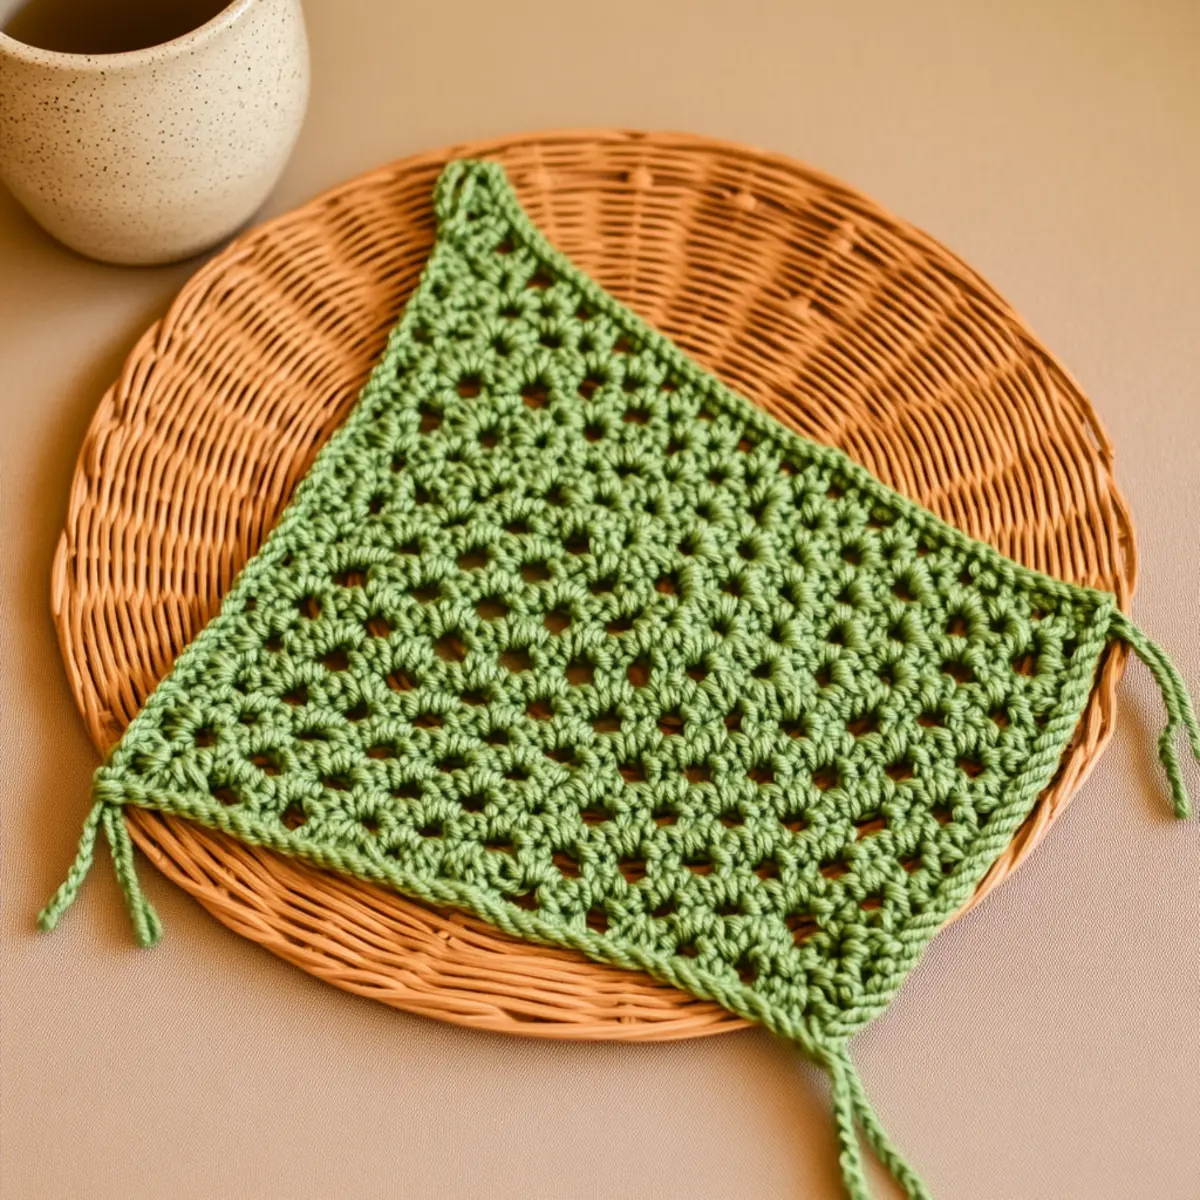
For a polished finish on your granny bandana, work a round of single crochet (sc) around the entire perimeter. This not only adds structure but also helps to smooth out the edges, making it neat and clean, enhancing its aesthetic appeal.
Step 3: Blocking
Once your granny bandana is complete, gently block it to even out the stitches. This step is essential for showcasing your beautiful crochet work. Lay it flat or use a damp cloth to help shape it evenly, providing a lovely finishing touch to your labor of love.
Expert Tips for the Granny Bandana
-
Gauge Matters: Always check your gauge with a swatch before starting the bandana to ensure a great fit. It prevents any sizing surprises later on!
-
Even Tension: Keep an eye on your tension; too tight can cause puckering, while too loose may distort the shape. Find a comfortable flow.
-
Count Your Stitches: Stay mindful of your stitch count throughout each row. Missing or dropping a stitch can lead to uneven sections that might be hard to fix later.
-
Finish Strong: To achieve a polished look, consider a simple single crochet or slip stitch border around the edges. This will complete your Granny Bandana beautifully.
-
Blocking Benefits: Don’t skip the blocking! Wet blocking your finished piece will even out the stitches and enhance the overall appearance, especially with cotton yarn.
-
Breaks are Key: Take regular breaks while working on your bandana. This helps maintain focus and ensures you avoid fatigue, keeping your project enjoyable and stress-free!
Granny Bandana Variations & Substitutions
Embrace your creativity and make this crochet project truly your own by exploring these fun variations!
-
Yarn Substitutions: Choose bamboo or a cotton-acrylic blend for a different texture and increased durability. These alternatives can add a new dimension to your bandana while maintaining its style.
-
Color Blocking: Mix and match bold colors or pastels to create vibrant blocks throughout your bandana. This technique can transform your piece into a true statement accessory.
-
Sizing Adjustments: Add or subtract rows for a custom fit. Whether you’re crafting for a child or looking to fit a larger adult size, simply modify the foundation chain and stitch count.
-
Texture Modifications: Add fringe to the edges for a playful touch that dances in the breeze. This simple embellishment can take your Granny Bandana from chic to fabulous!
-
Embellishments: Consider stitching on beads or fabric appliqués to give your bandana a personalized flair. Each addition tells your unique crafting story.
-
Gradient Yarn: Using yarn that gradually shifts in color can create a beautiful ombre effect. This eye-catching style is sure to turn heads wherever you go.
-
Extra Ties: If you prefer a secure fit, crochet longer ties or use crochet chain links for added functionality. This adjustment not only enhances practicality but also allows for fun styling choices.
-
Decorative Borders: Finish your bandana with a lacey scalloped edge for a feminine touch. This charming detail can elevate the overall design, making it even more delightful.
For more ways to personalize your crochet projects, feel free to check out this guide to colorful granny square crochet. Happy crafting!
How to Wash and Care for Your Granny Bandana
-
Machine Washing: Use cold water and a gentle cycle to clean your Granny Bandana. Avoid agitation to prevent felting or pilling, ensuring your lovely texture stays intact.
-
Hand Washing: For a more delicate touch, hand wash in cool water with mild detergent. Gently squeeze out excess moisture without wringing to maintain the shape.
-
Drying/Blocking: Lay flat on a clean, dry surface to air dry. If you want to block your bandana, pin it in shape while wet to enhance its crisp lines and even out the stitches.
-
Storage: Store your Granny Bandana folded or rolled in a cool, dry place to prevent any creases or distortions. Keep it away from direct sunlight to preserve those vibrant colors.
Chic Granny Bandana FAQs
Can I use a different yarn type for my Granny Bandana?
Absolutely! While lightweight cotton or cotton blends are ideal for their drape and breathability, you can substitute with acrylic or bamboo yarn. Just be mindful of the yarn weight; aim for a similar medium-weight category to maintain the look and feel of your project.
How do I adjust the size of my Granny Bandana?
It’s an easy fix! To make it larger, increase your foundation chain. Try chaining in multiples of 3 + 1 for a good starting point, then add more rows. Conversely, if you want a smaller size, simply reduce the foundation chain and the number of rows to suit your preferences.
Why is my Granny Bandana curling at the edges?
Don’t panic! Curling is often due to tight tension. Make sure your stitches aren’t too tight—loosen up a bit while you crochet. Additionally, blocking your finished piece once completed will help flatten those edges and give it a polished appearance.
What hook size should I use for the Granny Bandana?
For the Granny Bandana, a 4.0 mm (G/6) crochet hook is recommended. This size provides comfortable tension, allowing for clear stitch definition. However, if you’re using a different yarn, check the label for recommended hook sizes and adjust accordingly!
How do I fix dropped stitches in my Granny Bandana?
If you’ve noticed a dropped stitch, don’t worry! You can easily fix it by pulling the yarn back to the level of the dropped stitch, then using a crochet hook to pull the working yarn back through. This will reintroduce it into your project! Remember to keep a careful count to avoid dropping stitches in the future.
How should I care for my Granny Bandana?
To keep your Granny Bandana looking fresh, hand wash it in cold water and lay it flat to dry. Avoid wringing it out to maintain the shape and texture. If you’ve used cotton yarn, consider gentle blocking after washing to help reshape it beautifully!
Leave a Reply